Photogrammetry has become an essential technology for creating detailed 3D models of real-world environments and objects. Whether for surveying, archaeology, engineering, or visual effects, converting photographs into accurate 3D data has never been more accessible. This comprehensive guide explores how to use Agisoft Metashape to produce high-quality 3D reconstructions, orthophotos, and digital elevation models (DEMs) from your images, using an efficient and professional workflow.
Table of Contents
- 1. What Is Photogrammetry?
- 2. Why Use Agisoft Metashape?
- 3. Recommended Hardware and Setup
- 4. Photo Capture: Tips and Best Practices
- 5. Full Workflow in Metashape
- 6. Optimizing Accuracy
- 7. Common Mistakes and Fixes
- 8. Exporting and File Formats
- 9. Advanced Tools and Python Scripting
- 10. Real-World Applications and Case Studies
- 11. Further Learning and Resources
- 12. Conclusion
1. What Is Photogrammetry?
Photogrammetry is the science and technology of obtaining reliable 3D information about physical objects and the environment by recording, measuring, and interpreting photographic images. In simple terms, it means turning 2D photos into 3D models.
It works by analyzing multiple overlapping images of a scene, identifying common points between them, and calculating spatial relationships using triangulation and camera geometry. The result is a digital reconstruction of the photographed object or landscape — including detailed textures, geometries, and elevation data.
This technique is widely used in industries like:
- Architecture and engineering (BIM integration, planning)
- Archaeology and cultural heritage (site documentation)
- Surveying and topography (terrain mapping, GCP-based georeferencing)
- Agriculture (crop health via multispectral imagery)
- Visual effects and game development
With the rise of UAVs (drones) and powerful desktop software like Metashape, photogrammetry is now affordable and accessible to professionals and researchers alike. Read also “How to Turn Drone Images into 3D Models with Agisoft Metashape”.
2. Why Use Agisoft Metashape?
Agisoft Metashape is a professional-grade photogrammetry platform designed for creating accurate 3D models, DEMs, orthophotos, and more from photographic data. It supports advanced workflows for drone mapping, terrestrial photography, multispectral cameras, and industrial scanning. Read also “How to Create 3D Models from Photos with Agisoft Metashape: Step-by-Step Tutorial”.
Here’s why Metashape is trusted by thousands of professionals worldwide:
- Precision: Metashape delivers survey-grade accuracy when using GCPs, RTK/PPK geotags, or camera calibration.
- Flexible input: Works with RGB, multispectral, thermal, fisheye, and even scanned images.
- Automation: Automate projects using Python scripting or batch processing for speed and consistency.
- Scalable: Handle everything from 20 images to 20,000+ with GPU acceleration and network processing.
- Cross-platform: Available on Windows, macOS, and Linux.
Unlike cloud-only tools, Metashape gives you full control of your data, crucial for privacy-sensitive industries such as defense, urban planning, or archaeology. Read “5 Powerful Agisoft Metashape Features You Probably Aren’t Using (Yet)”.
3. Recommended Hardware and Setup
Photogrammetry is resource-intensive, especially during dense cloud and mesh generation. For optimal performance with Metashape:
- CPU: Intel i7/i9 or AMD Ryzen 7/9 with at least 6 cores (12 threads)
- GPU: NVIDIA GPU with CUDA support – RTX 3070/4070 or higher is highly recommended
- RAM: Minimum 32 GB, ideally 64 GB or more for large datasets
- Storage: SSD for the system and processing folders (1 TB+)
- Monitor: A large display (4K optional) helps during manual editing, especially for dense clouds and mesh refinement
If processing extremely large datasets, consider using network processing with multiple machines running Metashape Pro. GPU and RAM distribution can dramatically reduce total processing time.
4. Photo Capture: Tips and Best Practices
Good input equals good output. The quality of your photogrammetric reconstruction depends heavily on how the photos are taken. These best practices apply whether you’re using a drone, handheld camera, or tripod-mounted DSLR.
- Image Overlap: Aim for at least 70–80% front overlap and 60–70% side overlap.
- Consistent Lighting: Avoid shadows, overexposed skies, or highly reflective surfaces. Cloudy days are often best for terrain.
- Fixed Focus: Use manual focus or lock autofocus to prevent shifting focus between shots.
- Low ISO: Keep ISO low to reduce noise (ISO 100–200 recommended).
- Shutter Speed: Fast shutter speed (1/800s or faster) avoids motion blur.
- Camera Angle: For drone surveys, include nadir (straight down) and oblique (angled) images for better geometry capture.
- EXIF Data: Preserve original metadata; Metashape uses this for geotagging and lens info.
When capturing small objects or indoor spaces, use a tripod and consistent distance. Ensure your lighting is even and avoid specular reflections. Read also “10 Pro Tips to Get Better 3D Models with Agisoft Metashape”.
5. Full Workflow in Metashape
This is a step-by-step outline of a typical photogrammetry workflow using Agisoft Metashape Professional. You can run each step manually or automate the process with Python scripting or batch processing.
Step 1: Add Photos
Drag and drop your images or use the menu: Workflow > Add Photos. If your project has multiple cameras or sessions, group images into chunks.
Step 2: Align Photos
Go to Workflow > Align Photos. Choose High or Medium quality, and enable adaptive camera model fitting. This generates a sparse cloud and calculates camera positions.
- Accuracy: Higher accuracy improves camera alignment but increases processing time
- Key Point Limit: Leave at default (40,000)
- Tie Point Limit: Optional, lower for large datasets
Step 3: Import or Place Ground Control Points (Optional)
If working with survey-grade precision, import GCPs and mark them manually. Then reoptimize the camera alignment from the Tools > Optimize Cameras menu.
Step 4: Build Dense Cloud
Select Workflow > Build Dense Cloud. Choose quality (Medium or High recommended). The depth filtering option can be set to Aggressive to reduce noise or Mild for more detail retention.
Step 5: Build Mesh
Go to Workflow > Build Mesh. Choose data source: Dense Cloud or Depth Maps. Set face count based on output needs. For terrain, use the Height Field surface type; for objects, use Arbitrary.
Step 6: Build Texture (Optional)
Use Workflow > Build Texture to generate a high-quality texture map on your mesh model. Texture mapping is essential for visualization and 3D presentation, less so for geospatial outputs.
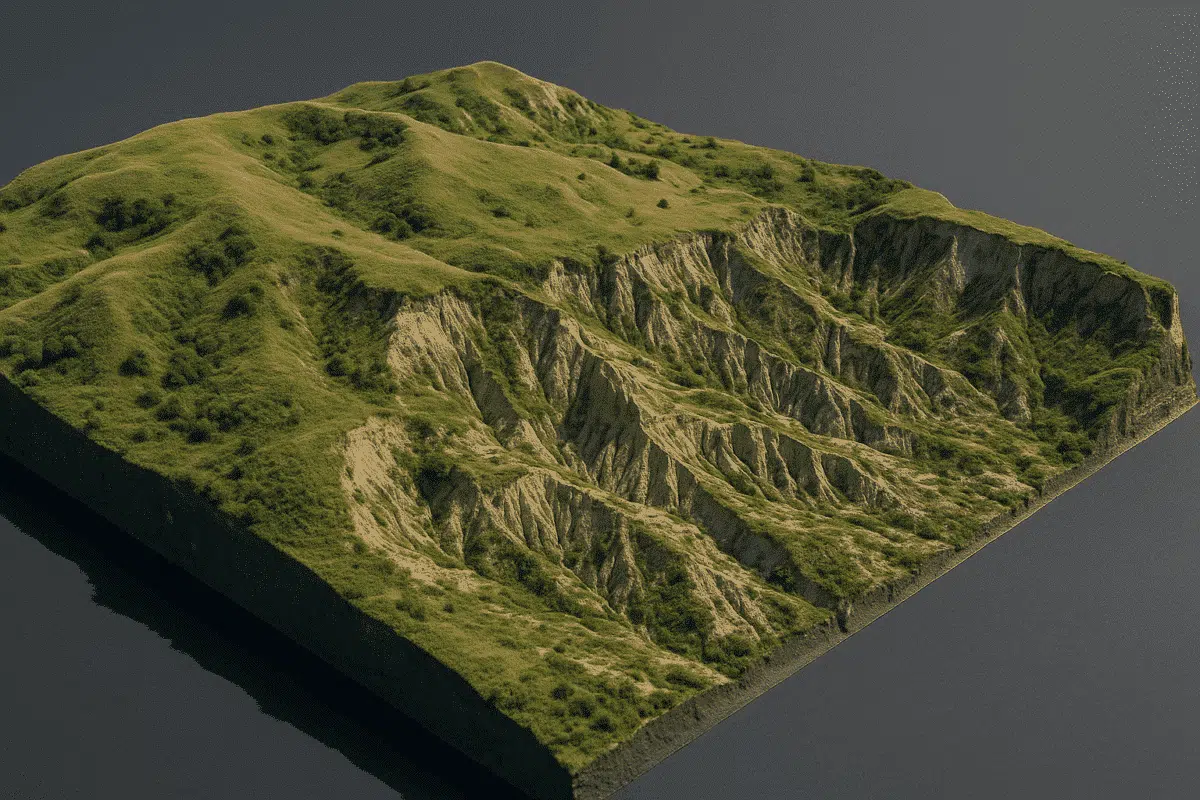
Step 7: Build DEM and Orthomosaic
To create topographic products, build a digital elevation model (DEM) and orthomosaic image from the dense cloud or mesh. You can also generate contour lines (e.g., 1 m intervals) for CAD/GIS workflows.
Step 8: Export Your Results
- Point Cloud: LAS, LAZ, XYZ, PLY
- DEM: GeoTIFF, IMG, XYZ
- Orthomosaic: GeoTIFF, PNG, JPEG
- Mesh: OBJ, FBX, 3D PDF, GLB, USDZ
- Contours: DXF, SHP
Use File > Export for each data type. File naming and coordinate system consistency are important for GIS integration.
6. Optimizing Accuracy
While Metashape is capable of producing visually accurate models from basic photo sets, achieving survey-grade accuracy requires intentional setup and refinement throughout your workflow. Here are essential techniques to ensure high accuracy:
- Use RTK/PPK-Enabled Drones: Geotagged images from RTK drones reduce the need for GCPs and improve alignment precision.
- Ground Control Points (GCPs): For professional applications, use GCPs measured with GNSS to anchor your project to real-world coordinates. Mark GCPs in at least 3–5 images each.
- Camera Calibration: Use a known calibration profile or enable camera model fitting in the alignment step. Avoid auto-focus during capture.
- Reoptimize Cameras: After adding GCPs or markers, always run Tools > Optimize Cameras to reduce reprojection error.
- Check RMS Error: In the Reference pane, check your GCP residuals. Aim for < 2 cm in X, Y, and Z for high-precision results.
- Use Scale Bars: For object scanning without GPS, add scale bars to ensure metric scaling.
You can also reduce distortion and improve point cloud density by using fixed-lens cameras, avoiding wide-angle fisheye effects, and ensuring consistent focal length.
7. Common Mistakes and How to Fix Them
Even experienced users run into problems in photogrammetry. Here are the most common mistakes encountered in Metashape projects — and how to solve them.
📌 Misaligned Cameras
- Problem: Some images fail to align, or alignment results look warped.
- Cause: Insufficient overlap, featureless terrain, or motion blur.
- Solution: Increase overlap, remove blurred images, or add markers manually. Try realignment with increased key/tie points.
📌 Soft or Incomplete Mesh
- Problem: Final mesh lacks sharp features or has holes.
- Cause: Poor dense cloud quality, shadows, or moving objects in photos.
- Solution: Improve photo consistency, apply mild filtering, use depth maps as mesh source, fill gaps manually with mesh editing tools.
📌 Inaccurate DEM or Orthomosaic
- Problem: Elevation surfaces are bumpy or contain artifacts.
- Cause: Sparse or noisy dense cloud, poor camera positions.
- Solution: Improve image set, reoptimize alignment, clean sparse/dense cloud before DEM generation.
📌 Crashes During Processing
- Problem: Out-of-memory error or system crash during dense cloud or mesh build.
- Cause: Large dataset exceeds system capacity.
- Solution: Reduce quality setting, use chunk splitting, or enable tiled processing. Ensure enough free disk space and RAM.
Tip: Always save your project before intensive steps and enable auto-saving in Preferences.
8. Exporting and File Formats
Once your 3D reconstruction is complete, you can export your data in a wide range of formats for GIS, CAD, web, AR/VR, or documentation purposes. Export options are found under File > Export and vary depending on the type of data selected.
Point Cloud Export
- Formats: LAS, LAZ, PLY, XYZ
- Use cases: Topographic modeling, vegetation classification, LiDAR comparison
Digital Elevation Model (DEM)
- Formats: GeoTIFF (.tif), IMG
- Use cases: Terrain analysis, flood modeling, slope calculation
Orthomosaic
- Formats: GeoTIFF, JPEG, PNG
- Use cases: Urban planning, land-use studies, infrastructure inspection
Mesh Models
- Formats: OBJ, FBX, 3DS, STL, COLLADA, GLB, USDZ, 3D PDF
- Use cases: AR/VR integration, architectural visualization, printing
Contours
- Formats: SHP, DXF, DWG
- Use cases: Topographic mapping, engineering planning
Before exporting, ensure you assign the correct projection system in the Reference pane to avoid geolocation errors. Also check resolution and scale settings where applicable.
9. Advanced Tools and Python Scripting
Metashape Professional includes several advanced features for enterprise users, automation, and large-scale processing. Here are key tools you should explore:
Python API
Metashape supports scripting with Python 3. This allows batch processing, automation of repetitive tasks, and integration into larger pipelines. Scripts can be executed at startup, from the console, or from the Tools menu.
Example use cases:
- Batch importing and alignment of hundreds of image sets
- Automated GCP import and marker placement
- Exporting meshes and DEMs in bulk
- Cloud backups or PDF report generation
Network Processing
Available in Metashape Pro, network processing lets you distribute heavy tasks (alignment, dense cloud, mesh) across multiple workstations. This greatly reduces time required for large projects.
Agisoft Cloud
With a valid license, you can upload your model to cloud.agisoft.com and share it with collaborators or clients through interactive viewers or embedded 3D windows on your site.
Depth Maps and Masks
Metashape also allows creation of depth maps from original photos, which can be used to build cleaner meshes or simulate alternative lighting conditions. You can also apply background masks automatically or manually for indoor scanning workflows.
10. Real-World Applications and Case Studies
Agisoft Metashape is trusted by organizations and professionals across the globe. Its real-world applications span a diverse range of industries. Here are a few examples that demonstrate its power and flexibility:
🏛️ Archaeology and Cultural Heritage
Archaeologists use Metashape to create 3D reconstructions of ancient ruins, artifacts, and excavation sites. These models are invaluable for documentation, restoration planning, and virtual preservation. Metashape’s ability to process oblique and close-range images is ideal for fragile sites.
🌍 Environmental and Topographic Surveying
Surveyors use RTK-enabled drones to map landscapes and generate accurate elevation models. These are used for flood risk analysis, construction planning, and erosion studies. Metashape’s support for GCPs and dense point clouds ensures topographic precision.
🏗️ Architecture and Engineering
Architects and structural engineers use Metashape for building facades, historical structures, and interior reconstruction. Models can be exported to BIM platforms, used for retrofitting, or shared as interactive 3D PDFs with stakeholders.
🚜 Agriculture and Forestry
Using drones equipped with RGB or multispectral cameras, agronomists monitor crop health, measure canopy volume, or detect disease hotspots. Orthomosaics and NDVI maps generated in Metashape support precision farming and yield forecasting.
11. Further Learning and Resources
To deepen your skills or solve specific problems, explore the following resources:
- Official Agisoft Metashape Site – Software updates, changelogs, features
- Metashape Knowledge Base – Detailed guides and scripting examples
- Agisoft YouTube Channel – Video tutorials and demos
- Agisoft Community Forum – Peer questions and developer insights
- Our Metashape Blog – Tips, workflows, updates, and real-world use cases
We also recommend following relevant hashtags like #photogrammetry, #agisoft, #drone3D on LinkedIn and Twitter for community insights.
12. Conclusion
Agisoft Metashape offers unmatched capabilities for professionals in 3D mapping, surveying, and spatial modeling. With the right preparation, images, and workflow, you can generate accurate, high-resolution 3D models of nearly any object or environment.
This guide has covered every step of the process — from hardware setup and photo capture to advanced scripting and export strategies. Whether you’re a drone operator, researcher, engineer, or visual artist, Metashape provides the flexibility and precision required to bring your projects to life.
Have questions or want to explore more? Browse our tutorials or contact our support team for tailored help.