Agisoft Metashape is one of the most advanced photogrammetry platforms for turning aerial or terrestrial images into detailed 3D models. Beyond geometry and point clouds, what truly brings these models to life is their texture mapping — the process of applying color, light, and surface information onto a 3D mesh. Understanding the types of texture maps in Metashape is crucial for producing photorealistic models, whether for surveying, architecture, gaming, or visual effects.
This article provides a complete overview of texture map types available in Agisoft Metashape, explaining how each one works, when to use it, and how to optimize texture generation for the best balance between realism, performance, and file size.
What Is a Texture Map in Agisoft Metashape?
In simple terms, a texture map is a 2D image applied to a 3D surface to define its appearance. While the 3D mesh provides shape and structure, the texture map defines the model’s visual details — colors, patterns, brightness, and even surface irregularities. Agisoft Metashape generates textures directly from photographs captured during your photogrammetry project, projecting them onto the reconstructed geometry.
Textures are stored as image files (usually .JPG or .TIFF) and are linked to the 3D model file (like .OBJ, .PLY, or .FBX). When correctly processed, they make the model look realistic and consistent under various lighting conditions.
Main Texture Mapping Modes in Metashape
Agisoft Metashape offers several texture mapping modes, each designed for a specific purpose. The main modes include:
- Mosaic
- Average
- Max Intensity
- Min Intensity
Let’s break down what each type means and how to use it effectively.
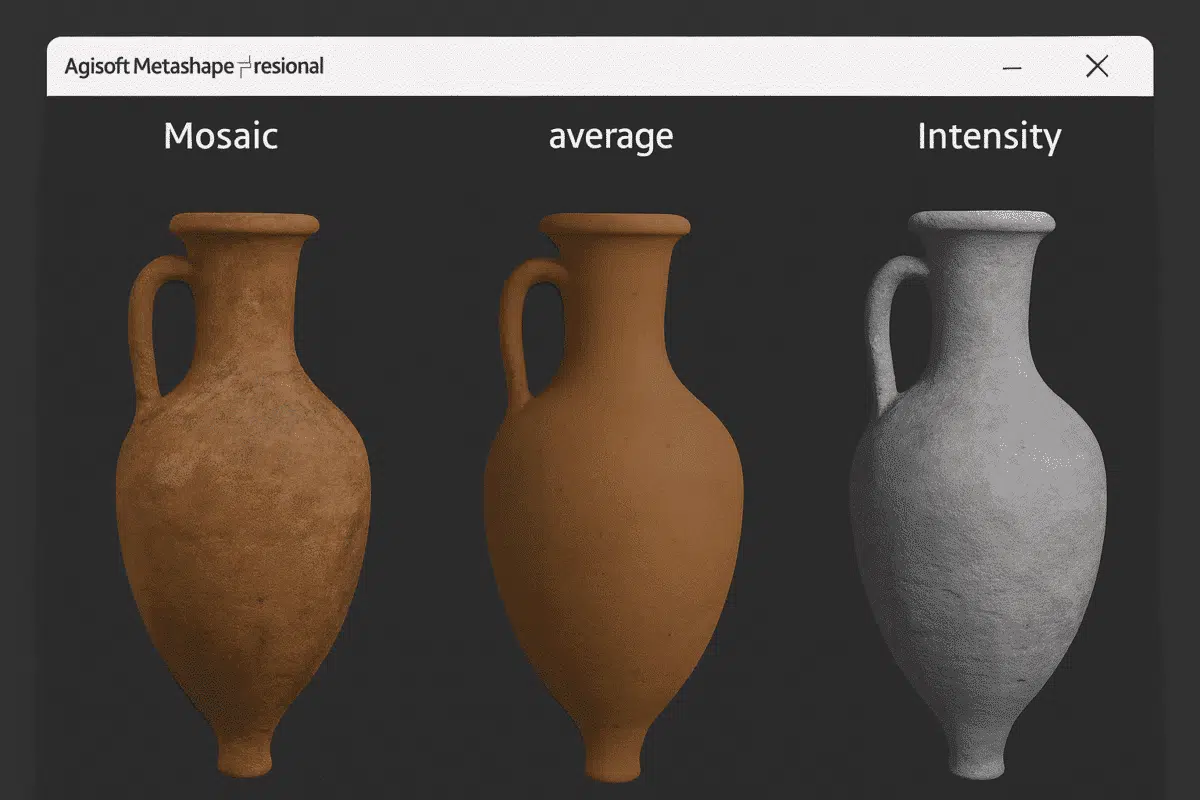
1. Mosaic (Default and Recommended)
The Mosaic texture mode is the default and most commonly used option in Metashape. It intelligently blends multiple overlapping images to create a seamless, high-quality texture with balanced color and brightness. The algorithm selects the best pixel information from each image based on visibility and sharpness.
Best for: Projects where image overlap is high and lighting conditions are consistent — such as drone surveys, architectural modeling, or archaeological reconstructions.
Advantages:
- Produces clean, seamless textures
- Reduces visible seams and lighting inconsistencies
- Ideal for large-scale or outdoor models
Tip: When exporting for visualization or 3D printing, choose the “Mosaic” mode with “Color Correction” enabled to balance brightness variations between photos.
2. Average
The Average texture mode blends all overlapping image data equally. Instead of selecting the best pixels, it computes the average color value from all contributing images. This method is less contrasty and can appear softer, but it minimizes the risk of visible seams or exposure differences.
Best for: Models captured under variable lighting or with inconsistent exposure between images.
Advantages:
- Useful for diffuse lighting conditions
- Eliminates strong transitions between image boundaries
- Good choice for scientific or analytical visualizations
Drawback: The resulting texture can look slightly blurred compared to “Mosaic,” which may not be ideal for presentation-quality visuals.
3. Max Intensity
In Max Intensity mode, Metashape assigns the brightest pixel value from overlapping images to each texel (texture pixel). This mode emphasizes bright features and high reflectivity, which can help highlight certain materials or textures with strong illumination.
Best for: Reflective surfaces, such as metallic structures, water bodies, or bright roofs.
Advantages:
- Enhances high-contrast regions
- Useful for analyzing reflective or highly illuminated surfaces
Drawback: May produce overexposed areas or unnatural color tones if used for general texture mapping.
4. Min Intensity
Conversely, Min Intensity assigns the darkest pixel value from overlapping images. It emphasizes shaded regions, texture depth, and shadow details, which can be useful for analyzing terrain or surfaces with strong contrast.
Best for: Models where surface shadows or low-intensity areas are significant, such as caves, geological formations, or shaded vegetation.
Advantages:
- Highlights fine surface relief
- Useful for scientific visualization of topographic variations
Drawback: Can produce dark, low-contrast textures unsuitable for general-purpose visualization.
Texture Mapping Options and Parameters
When generating textures in Agisoft Metashape, you can adjust several parameters to optimize quality and performance. These settings are found under Workflow > Build Texture.
Texture Size / Count
The Texture size parameter defines the resolution of the output texture. Common values range from 4096×4096 (4K) to 16384×16384 (16K). Higher values yield more detail but increase file size and memory usage.
Use multiple texture files (Texture count) if your model is large or complex. This allows Metashape to distribute texture information across several files, maintaining quality while improving performance in 3D viewers.
Blending Mode
In addition to texture type, the blending mode determines how overlapping pixel values are combined. Mosaic blending uses visibility-based selection, while Average blending averages all pixel values. For most photogrammetry projects, “Mosaic” blending with color correction yields the most visually consistent results.
Enable Hole Filling and Color Correction
Check the options for Fill Holes to automatically interpolate missing texture areas, and Enable Color Correction to balance exposure differences between source images. These options are particularly useful for outdoor scenes with variable sunlight.
Exporting and Using Texture Maps
Once your texture is generated, you can export it along with the 3D model for use in CAD, GIS, game engines, or visualization software. Go to File > Export Model and choose a format that supports textures (e.g., OBJ, FBX, 3DS, or glTF).
Metashape automatically exports texture files alongside your model, typically as model_texture.jpg or model_texture.tif. You can further edit or enhance these textures in tools like Photoshop, Blender, or Substance Painter for advanced visualization or rendering workflows.
Best Practices for High-Quality Textures
- Capture photos with consistent lighting and exposure to minimize color differences.
- Use a fixed aperture and white balance during image acquisition.
- Ensure sufficient overlap between images (75–85%) to improve blending accuracy.
- Choose “Mosaic” texture type for realistic results and enable color correction.
- For analytical projects, export separate spectral or intensity maps for study.
Conclusion: Choose the Right Texture Map for the Right Purpose
Textures are what make 3D models not just geometrically accurate but visually compelling. In Agisoft Metashape, choosing the right texture map type — whether Mosaic, Average, Max Intensity, or Min Intensity — depends on your specific goals. For most applications, the Mosaic mode with color correction is the best choice, offering realistic, seamless textures ideal for visualization and analysis.
By understanding how texture mapping works and fine-tuning parameters, you can enhance both the aesthetic and analytical quality of your 3D models. Whether you’re creating digital twins, mapping terrain, or reconstructing heritage sites, mastering texture map generation in Metashape ensures that your models are accurate, efficient, and visually impressive.