Agisoft Metashape is one of the most powerful photogrammetry software solutions available today, widely used for 3D modeling, mapping, cultural heritage documentation, and industrial applications. Among its advanced features, working with masks is a crucial technique that significantly enhances project accuracy and efficiency. Masks allow users to define which parts of an image should be considered or ignored during processing, helping reduce noise, improve alignment, and speed up computation.
In this comprehensive guide, we’ll explore how masks work in Metashape, when and why to use them, and best practices to optimize your workflow. Whether you are new to photogrammetry or an experienced user looking to refine your techniques, mastering masks is essential to achieving professional results.
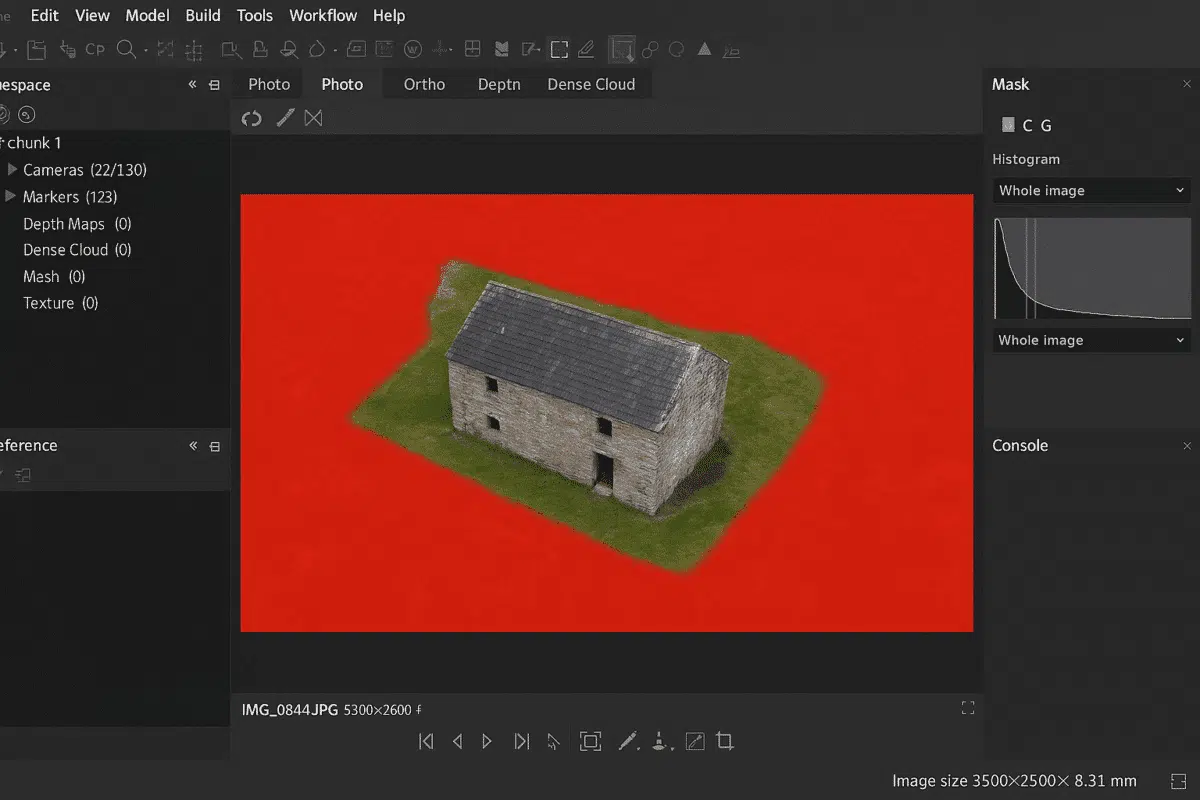
What Are Masks in Agisoft Metashape?
In Agisoft Metashape, a mask is a defined area of an image that is either included or excluded from processing. Typically, masks are used to exclude unwanted parts of an image — such as the background, sky, moving objects, or equipment — that could interfere with camera alignment and reconstruction. By masking irrelevant regions, you can focus the software’s attention on the parts of the scene that matter most, resulting in cleaner, more accurate 3D models.
Masks can be applied to individual images or across entire sets, and they can be created manually, imported from external sources, or generated automatically using various tools. Once applied, Metashape will ignore masked areas during key processing steps such as photo alignment, depth map generation, and texture creation.
Why masks matter:
- Improved alignment: By removing irrelevant details, the matching algorithm focuses on consistent features, increasing alignment accuracy.
- Cleaner 3D reconstruction: Masks help avoid artifacts caused by moving objects, reflections, or cluttered backgrounds.
- Faster processing times: With fewer pixels to analyze, the software runs more efficiently, saving time and computational resources.
Methods for Creating and Applying Masks
Agisoft Metashape provides several flexible methods for creating masks, depending on the complexity of your project and the type of images you are working with. Here are the most common approaches:
1. Manual Masking
Manual masking allows you to directly define mask areas using selection tools within Metashape’s photo view. You can use the lasso, polygon, or magic wand tools to draw around regions you want to exclude. Once selected, simply right-click and choose “Add Selection to Mask” or “Invert Selection” if you prefer to keep only the selected region.
This method is ideal for projects with a limited number of images or when precision is required — for example, when isolating a single object from a complex background.
2. Importing Masks from External Files
Masks can also be imported from external image files (such as PNG or TIFF) where transparent areas represent masked regions. This method is particularly useful for workflows involving chroma keying or when masks are generated by external software (like Photoshop or GIMP). To import, right-click on the image in the Workspace pane and select “Import Mask”.
Supported mask sources include:
- Alpha channel – Transparent pixels define the masked area.
- Color-based selection – Areas of a specific color are masked.
- From model – Masks generated from the 3D model itself can be applied back to the original photos.
3. Automatic Mask Generation Using Background Differencing
For projects with a static background (e.g., objects photographed on a turntable), Metashape offers an automatic background masking feature. By capturing a photo of the empty background and comparing it with your dataset, the software automatically identifies and masks areas that remain constant.
To use this feature:
- Capture a clean background image without the subject.
- In Metashape, select Tools → Import Masks → From Background.
- Choose the background image as a reference, and Metashape will generate masks for all images.
This technique can save hours of manual work, especially in controlled studio environments.
Using Masks During Different Workflow Stages
Understanding how masks influence each stage of the Metashape workflow is key to maximizing their benefits. Here’s how they apply at various stages:
Photo Alignment
During the alignment phase, Metashape detects and matches key points across images. Unwanted regions such as the sky, background clutter, or moving objects can confuse the algorithm, leading to poor alignment. Masks ensure only relevant areas are considered, improving both accuracy and speed.
Depth Map Generation and Dense Cloud
Masked areas are excluded from depth map calculations, reducing noise in the dense point cloud. This is especially important in projects where reflections, shadows, or objects outside the region of interest might otherwise introduce inaccuracies.
Model and Texture Building
While masks are not always necessary during model generation, they can be beneficial for refining texture creation. Excluding irrelevant areas ensures that the resulting texture maps are focused on the subject, improving the visual quality of the final 3D model.
Best Practices for Masking in Metashape
To achieve the best results when working with masks, consider the following best practices:
- Mask early in the workflow: Apply masks before photo alignment to maximize their impact on accuracy and speed.
- Use consistent backgrounds: If possible, capture images against a uniform background to make masking easier and more precise.
- Automate when possible: Leverage background differencing or batch import to save time on large projects.
- Check mask accuracy: Review masks visually before processing to ensure they correctly include or exclude the intended regions.
- Combine methods: For complex scenes, mix manual and automatic masking techniques for optimal results.
Advanced Tips: Scripting and Batch Processing Masks
For users working on large-scale projects or automating workflows, Agisoft Metashape’s Python API provides powerful scripting capabilities. You can programmatically apply, edit, or import masks across hundreds of images, dramatically reducing manual work. This is especially useful for enterprise-scale photogrammetry projects or continuous data capture pipelines.
Example use cases for scripting masks include:
- Automatically applying background masks to entire datasets.
- Batch importing masks generated from external software.
- Combining masks with AI-based segmentation tools for complex datasets.
By integrating scripting with your masking workflow, you can achieve higher consistency, repeatability, and efficiency — all while minimizing human error.
Conclusion: Mastering Masks for Better Photogrammetry Results
Working with masks in Agisoft Metashape is a powerful technique that can dramatically improve the quality, speed, and reliability of your photogrammetry projects. Whether you are cleaning up background noise, excluding irrelevant objects, or enhancing alignment accuracy, masks give you precise control over how your data is processed. From manual selection tools to advanced background differencing and scripting, Metashape offers multiple ways to create and apply masks depending on your needs.
As photogrammetry continues to evolve across industries — from cultural heritage and architecture to mining, film production, and forensics — mastering masking techniques will become even more important. By incorporating masks into your workflow, you can ensure that every 3D model you produce is as accurate, detailed, and efficient as possible.