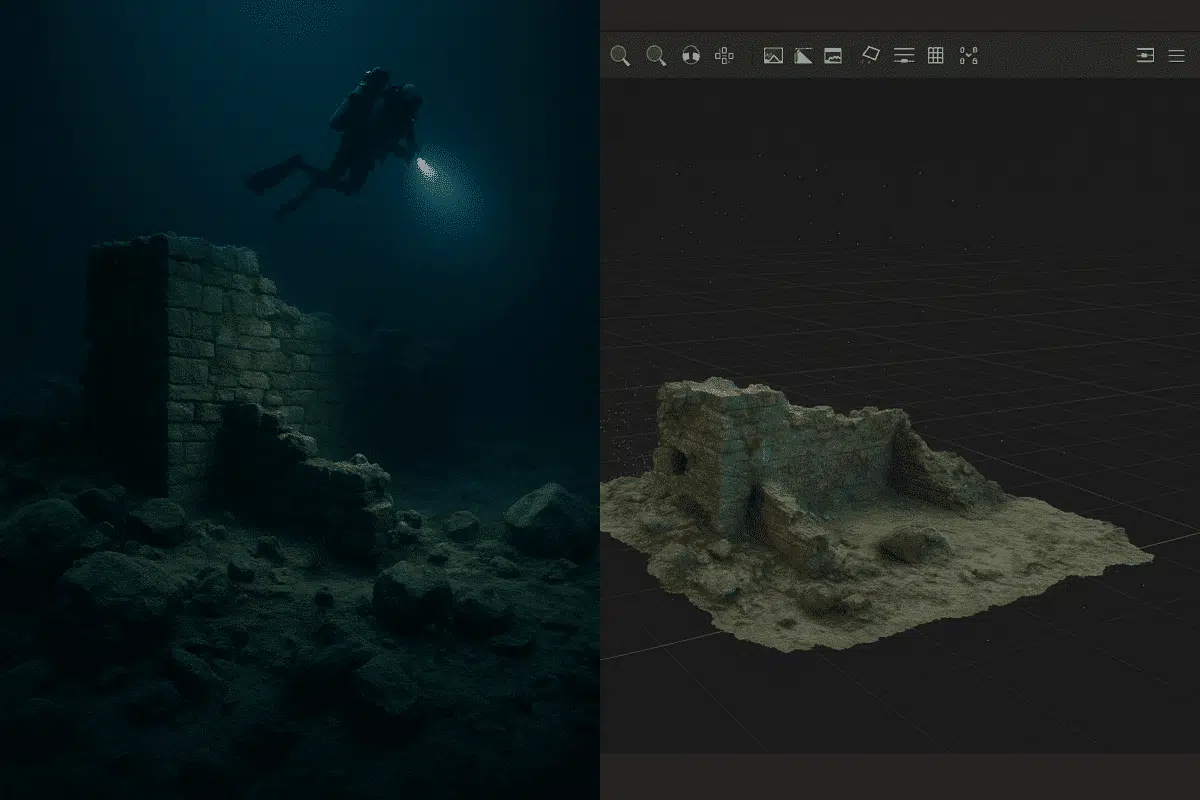
Photogrammetry in underwater or low-light environments presents unique challenges—from motion blur to color distortion and poor contrast. However, with the right techniques, Agisoft Metashape can still generate high-quality 3D models from images captured in these conditions. This article offers a practical guide to optimizing your workflow for underwater and low-light image processing using Metashape.
Challenges of Low-Light and Underwater Photogrammetry
Low-light environments (such as indoor spaces, tunnels, or caves) and underwater scenes often lead to:
- Low contrast and poor texture for feature matching
- Color distortion due to artificial lighting or water absorption
- Motion blur from unstable capture setups
- Limited visibility and turbidity in water
- Difficulty aligning frames due to similar image content
Step 1: Optimizing Image Capture in Difficult Environments
- Use Constant Lighting: Employ external lights or strobes to maintain consistent exposure. Avoid flashing lights or auto white balance.
- Shoot in RAW: If using a DSLR or high-end camera, capture in RAW for maximum flexibility in post-processing.
- Stabilize the Camera: Use tripods or underwater rigs to minimize movement, especially in flowing water or unsteady terrain.
- Overlap Coverage: Increase overlap (80%–90%) and take photos from multiple angles to help Metashape find matching features.
- Manual Focus: Lock the focus and exposure to avoid automatic adjustments mid-capture.
Step 2: Pre-Processing Images Before Importing into Metashape
- Color Correction: Use tools like Lightroom or Photoshop to correct blue/green casts (common underwater) or poor contrast.
- Noise Reduction: Apply light noise reduction, but avoid over-smoothing. Retain edge detail wherever possible.
- Sharpening: Apply slight sharpening to improve edge detection, especially in blurry or murky shots.
- Brightness Normalization: Match exposure across the dataset so Metashape treats the images more uniformly.
Step 3: Aligning Photos in Metashape
- Accuracy: Set to “High” for better keypoint matching in low-contrast areas.
- Key Point Limit: Increase to 60,000 or more to extract more features.
- Tie Point Limit: Increase to 10,000–20,000.
- Adaptive Camera Model Fitting: Enable for indoor or low-light scenes where lens distortion varies.
- Use Masks: Manually mask noisy areas or constant elements like reflections or floating particles.
Review the alignment by checking for unaligned cameras or misalignments. If needed, add manual markers to guide alignment.
Step 4: Building the Dense Cloud
- Quality: Use “High” or “Medium” depending on processing power.
- Depth Filtering: Set to “Aggressive” to remove floating artifacts, especially in water with suspended particles.
Once generated, inspect the dense cloud carefully. Use the lasso or rectangular selection tool to delete floating or noisy points manually.
Step 5: Mesh and Texture Optimization
- Surface Type: Use Arbitrary (3D) for complex underwater geometry.
- Face Count: Medium to high depending on model complexity.
- Texture Mapping: Enable mosaic mode and adjust blending to improve lighting uniformity.
- Hole Filling: Enable if necessary to patch missing areas.
Step 6: Export and Post-Processing
- Export Formats: OBJ or FBX for 3D viewing, GeoTIFF for orthophotos (if georeferenced).
- Post-Editing: Use Blender or MeshLab to clean or remesh complex models.
- Rendering: Apply color correction or relighting in Unreal Engine or Unity for presentations.
Use Cases for Underwater/Low-Light Photogrammetry
- Archaeological site modeling (shipwrecks, caves, tombs)
- Infrastructure inspection (sewers, tunnels, pipelines)
- Biological documentation (coral reefs, aquatic habitats)
- Museum or cultural heritage conservation
Conclusion
Processing underwater and low-light images in Agisoft Metashape is possible with the right preparation and post-processing. While challenges like noise and misalignment are common, they can be addressed with careful capture techniques and parameter tuning. With a bit of planning, you can turn even the most difficult datasets into accurate 3D models for science, conservation, or visualization.