Agisoft Metashape is one of the most widely used photogrammetry tools for creating 3D models, orthophotos, and digital elevation models from images. One of the key elements in achieving accurate results is the use of markers. Markers help align images, improve scaling, and provide a reference system for your 3D model. In this guide, we explain how to place markers in Agisoft Metashape and why they are essential for professional workflows.
What Are Markers in Agisoft Metashape?
Markers in Agisoft Metashape are reference points used to define precise positions within your dataset. They can be placed either manually by the user or automatically detected using coded targets. Markers play a crucial role in:
- Aligning photos more accurately by providing common reference points.
- Scaling the model to real-world dimensions.
- Georeferencing the project using Ground Control Points (GCPs).
- Improving accuracy in DEMs, orthomosaics, and 3D models.
Without markers, the model relies solely on image matching algorithms, which may not guarantee the level of precision required for surveying, engineering, or archaeological projects.
How to Add and Place Markers in Metashape
Placing markers in Metashape is straightforward, but requires attention to detail. Below are the steps:
- Open your project – Make sure images are already aligned, as markers work best on aligned data.
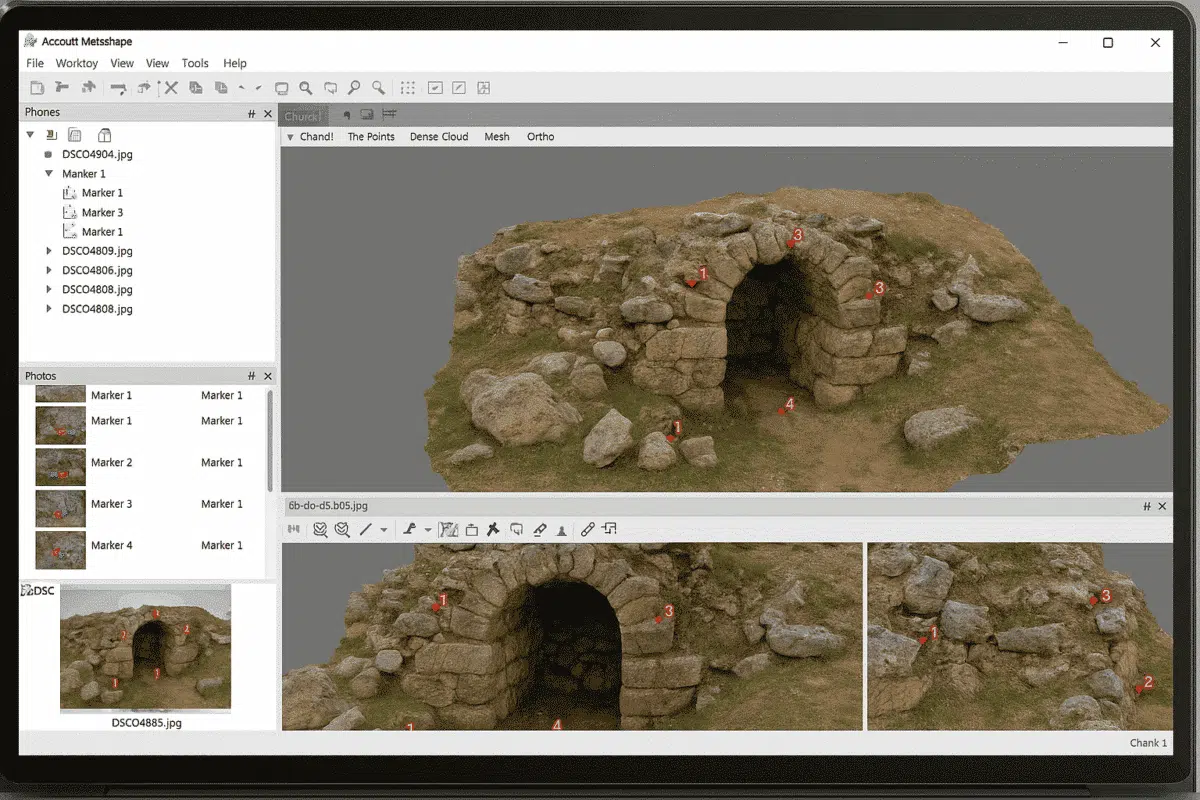
- Choose the location – In the Workspace or Model view, identify a recognizable feature (like a corner, stone, or man-made object).
- Add a marker – Right-click on the selected point in the photo pane or model view and choose Add Marker. A new marker will appear in the Markers list.
- Place the marker across multiple photos – To improve accuracy, adjust the marker position in several different images where the same feature is visible.
- Refine placement – Use the zoom tool and crosshairs to ensure the marker is exactly at the feature’s center.
The more images you use to define a marker, the more precise your model will be. Metashape will automatically optimize the marker position based on the available photos.
Using Ground Control Points (GCPs) with Markers
For projects that require georeferencing, markers are linked with Ground Control Points (GCPs). GCPs are measured with GPS or a total station in the field and then imported into Metashape. The workflow is as follows:
- Import GCP data – Usually provided in a CSV file containing coordinates and marker labels.
- Assign markers – Match the imported coordinates with manually placed markers inside the project.
- Optimize alignment – After assigning GCPs, run Optimize Cameras to improve the model’s spatial accuracy.
When correctly implemented, markers linked with GCPs drastically improve the precision of orthophotos and DEMs, making them suitable for surveying and mapping applications.
Best Practices for Marker Placement
While placing markers may seem simple, following best practices ensures higher accuracy and efficiency:
- Distribute markers evenly across the project area. Avoid clustering them in a single spot.
- Use clearly identifiable features like corners, painted targets, or coded markers provided by Agisoft.
- Verify marker accuracy by checking reprojection error in the Reference pane.
- Place at least three GCPs per project for scaling and orientation, but more are recommended for larger areas.
- Use coded targets if working with many markers, as they speed up the placement process.
By following these recommendations, you reduce errors and ensure your outputs meet industry standards.
Manual vs Automatic Marker Placement
Markers can be placed manually or automatically:
- Manual placement – Suitable for small projects or when only a few markers are needed. It allows higher control and precision.
- Automatic detection – Metashape can recognize coded targets placed in the field, automatically adding markers to the correct positions. This is ideal for large projects with many reference points.
Combining both methods is often the best strategy: use automatic detection to speed up the process, then manually refine positions for maximum accuracy.
Common Mistakes to Avoid
Even experienced users sometimes make errors when placing markers. Here are the most common mistakes:
- Using too few markers – At least three are needed for scaling, but more increase reliability.
- Placing markers inaccurately – Misalignment can reduce overall model accuracy significantly.
- Ignoring distribution – Markers should cover the entire area of interest, not just one part.
- Mixing coordinate systems – Always ensure your GCP coordinates and project coordinate system match.
Avoiding these mistakes ensures smoother workflows and more precise outputs.
Conclusion: Why Markers Are Essential in Metashape
Markers are not just optional tools—they are essential for professional photogrammetry. Whether you are creating 3D models for archaeology, surveying, mining, or construction, correctly placed markers improve alignment, scale, and georeferencing. By learning how to add, refine, and use markers effectively, you ensure that your final outputs meet the highest accuracy standards.
Ready to improve your Agisoft Metashape workflow? Start placing markers in your projects today and unlock the full potential of photogrammetry for your field of work.