Creating a 3D mesh in Agisoft Metashape is one of the most important steps in any photogrammetry workflow. A mesh transforms your aligned images and dense point cloud into a surface that can be textured, measured, and exported for further use. Whether you are working on archaeology, architecture, surveying, or creative projects, understanding how to build a mesh correctly will help you achieve accurate and visually appealing results. This guide walks you through the entire process in a clear and structured way.
Step 1: Prepare Your Project in Metashape
Before creating a mesh, make sure your project is well-prepared. Start by importing and aligning your photos. Metashape will analyze the images, detect tie points, and create a sparse point cloud. It is essential to verify the quality of your alignment to avoid errors in later stages.
- Check for blurry or misaligned images and disable them if necessary.
- Ensure ground control points (GCPs) or markers are correctly placed if you are working with georeferenced projects.
- Clean up any floating points in the sparse cloud that do not represent real surfaces.
This stage is critical: a clean and accurate alignment ensures that your mesh model will be precise and reliable. If you skip this verification step, you might end up with geometry distortions or noise in your final 3D model.
Step 2: Build a Dense Point Cloud
Once your photos are aligned, the next step is to create a dense point cloud. This process uses depth maps generated from overlapping images to build a detailed representation of your object or landscape.
In Metashape, go to the menu and select Workflow > Build Dense Cloud. You will be asked to choose quality and filtering settings:
- Quality: “High” or “Ultra High” will produce the best results, but they require more processing time and hardware resources. “Medium” is often a good balance.
- Depth Filtering: Choose “Moderate” or “Aggressive” if your dataset contains noise. “Mild” is recommended for clean data.
After the dense cloud is generated, inspect it carefully. Use the editing tools to remove unwanted points such as vegetation, moving objects, or artifacts. A well-prepared dense point cloud will make your mesh more accurate and easier to clean later.
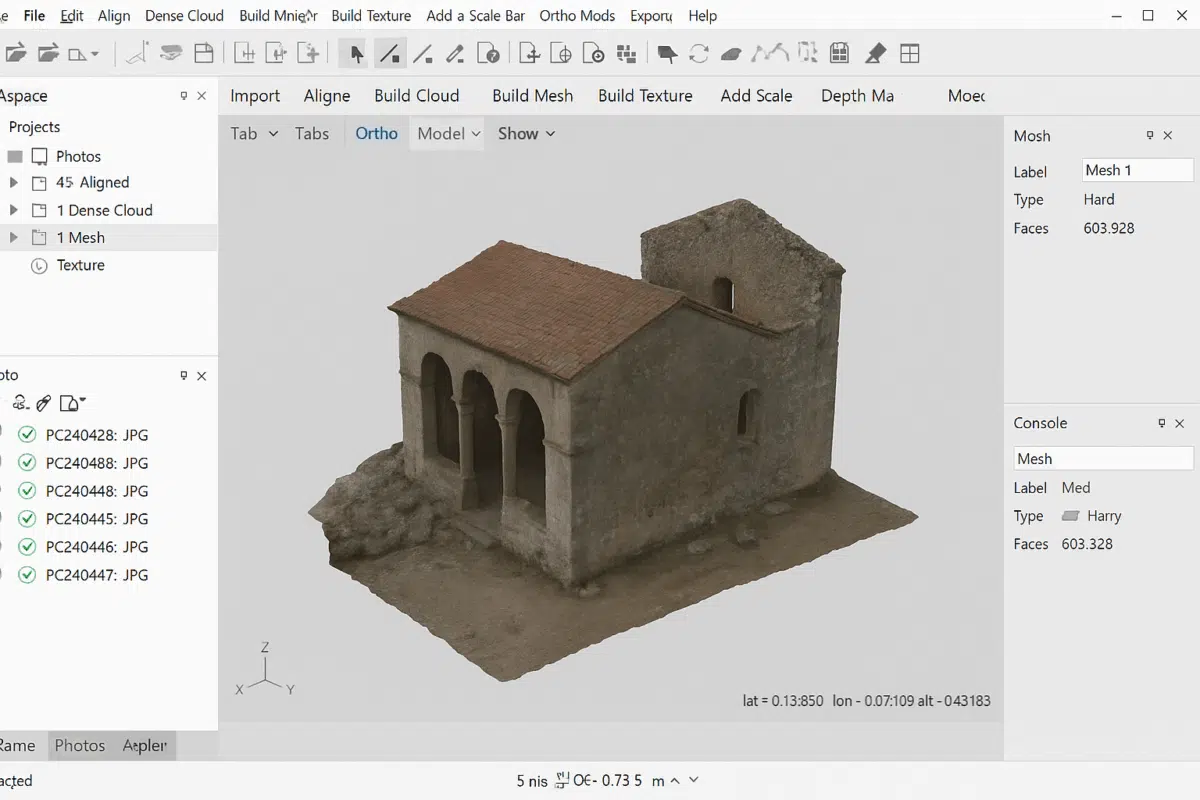
Step 3: Build the Mesh in Metashape
Now comes the core step: building the mesh. In Metashape, navigate to Workflow > Build Mesh. You can choose between two reconstruction sources:
- Depth Maps: Recommended for most projects, especially when you want high-quality detail and smooth surfaces.
- Dense Cloud: Useful for specific cases where you need more control over the geometry or when working with older hardware.
You will also be able to select additional settings:
- Surface Type: “Arbitrary” for objects without a clear ground plane (e.g., statues, artifacts). “Height Field” for terrains and aerial surveys.
- Face Count: Determines how many polygons will compose your mesh. A higher number creates more detail but also increases file size and processing requirements.
Once the process is complete, you will see your mesh appear in the 3D view. Rotate, zoom, and pan to evaluate its quality. Look for holes, spikes, or irregularities that may need correction.
Step 4: Optimize and Clean the Mesh
Even a well-built mesh may contain small imperfections. Agisoft Metashape offers several tools to edit and refine your mesh:
- Use the Selection Tool to remove floating geometry or isolated faces.
- Apply Smooth Mesh to reduce noise while preserving detail.
- Fill small holes manually or let Metashape automatically close gaps.
For projects that require lightweight models, you can also use the Decimate Mesh function to reduce polygon count. This is particularly useful for web visualization, VR/AR applications, or when exporting to platforms with file size limitations.
Step 5: Texture and Export
A mesh is not complete without textures. After creating and optimizing your mesh, go to Workflow > Build Texture. Choose the appropriate mapping mode (e.g., “Generic” for objects or “Orthophoto” for terrains). The texture will wrap your mesh with realistic photographic details, making it suitable for presentations, visualizations, or further analysis.
Finally, export your model in a format that suits your workflow. Agisoft Metashape supports common formats such as .OBJ, .FBX, .PLY, and .3DS. These can be imported into CAD software, GIS platforms, 3D modeling tools, or game engines.
Tips for Better Mesh Results
To maximize the quality of your mesh in Agisoft Metashape, keep in mind these best practices:
- Capture photos with consistent lighting and sufficient overlap.
- Use high-resolution images whenever possible, but balance file size with hardware capacity.
- Ensure your dataset is free of moving objects (people, vehicles, animals) that can create artifacts.
- Invest in a powerful GPU and sufficient RAM to handle larger projects efficiently.
These considerations can drastically improve your final mesh and reduce the time spent in editing and corrections.
Conclusion: Building Meshes with Confidence
Creating a 3D mesh in Agisoft Metashape may seem complex at first, but once you understand the step-by-step process, it becomes straightforward and highly rewarding. From preparing your project to building the mesh, cleaning it, and applying textures, each phase contributes to the accuracy and visual quality of your final 3D model.
Whether you are documenting cultural heritage, generating digital twins for engineering, or simply experimenting with photogrammetry, mastering the mesh creation process in Metashape is a key skill. With practice, you’ll be able to produce professional-grade models that meet the highest standards.
Want more tutorials on Agisoft Metashape? Keep following our blog for in-depth guides, tips, and workflows designed to make your photogrammetry projects a success.