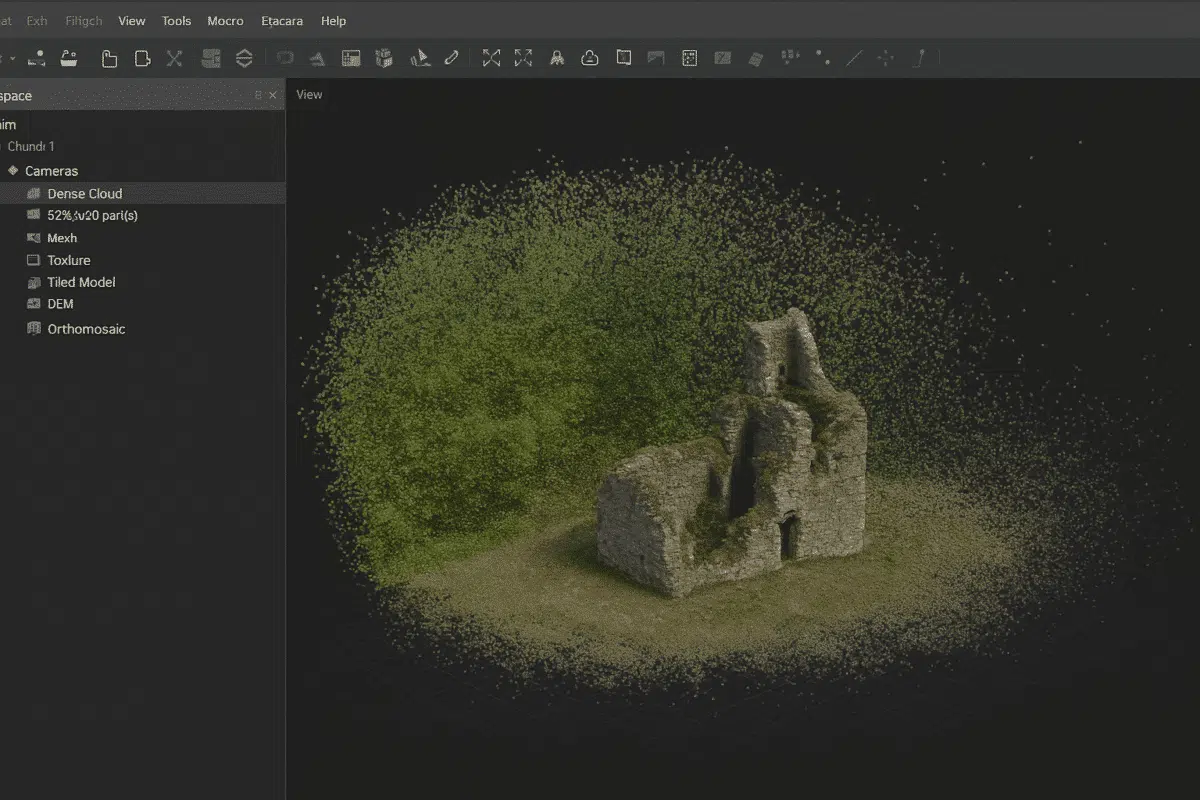
When working with Agisoft Metashape, one of the most common issues after generating a dense point cloud is the presence of noise — unwanted points that can degrade model accuracy and appearance. Whether you’re mapping urban environments or natural terrain, learning to clean noisy point clouds in Metashape is essential for creating high-quality outputs.
What Causes Noisy Point Clouds?
Noisy data in a dense cloud can result from various factors such as:
- Poor image quality (motion blur, low contrast)
- Shiny or reflective surfaces (glass, metal, water)
- Low overlap or gaps in coverage
- Vegetation movement (trees, grass)
- Incorrect depth settings during processing
Why Clean Your Point Cloud?
A clean point cloud helps improve:
- Accuracy of mesh and textured model
- DSM/DTM calculations
- Exported CAD and BIM workflows
- Visualization clarity
Step-by-Step: Cleaning Point Clouds in Metashape
Here’s how to clean your dense cloud in Agisoft Metashape (v2.0+):
Step 1: Open the Dense Cloud
Once you’ve aligned the photos and generated the dense point cloud:
- Switch to the “Model” view
- Select the “Dense Cloud” layer in the Workspace pane
Step 2: Use the Selection Tools
Metashape offers several selection tools to isolate noisy areas:
- Rectangle Selection (R): for box-like areas
- Free-Form Selection (F): for organic shapes
- Circle Selection (C): for targeted spots
- Connected Component Tool: isolate floating points
Step 3: Delete Unwanted Points
After selecting noisy data points, press Delete or go to Edit > Delete Selection. Be cautious not to remove valid points near edges or thin structures.
Step 4: Use the Classify Ground Tool (Optional)
For terrain models, use the Tools > Dense Cloud > Classify Ground Points feature. This separates ground and non-ground points (trees, buildings). You can then delete vegetation points for a cleaner DEM or DTM.
Step 5: Apply the “Filter by Confidence” Tool
Metashape assigns a confidence level (0–255) to each point based on photo coverage and quality. Go to:
Tools > Dense Cloud > Filter by Confidence- Set a threshold (e.g., 100 or 150)
- Remove points below this value
This automatic method helps remove poorly reconstructed areas.
Step 6: Save and Export
After cleaning your cloud:
- Right-click the Dense Cloud layer
- Select
Export Dense Cloud - Choose formats like LAS, PLY, XYZ, E57
Best Practices
- Use high-resolution, overlap-rich images (80/70%)
- Avoid windy or rainy conditions
- Capture oblique angles to fill in gaps
- Review each region before bulk deletion
When to Use External Tools
If your project requires even finer control, you can export the point cloud to external tools like:
- CloudCompare: For segmentation, noise removal, and comparison
- Trimble RealWorks: For infrastructure and construction scans
- Blender: For visual cleanup and mesh correction
Conclusion
Cleaning noisy point clouds in Agisoft Metashape is a critical step in professional 3D workflows. Whether you’re modeling archaeological sites, generating DSMs, or building BIM-ready datasets, a well-refined dense cloud ensures accuracy, visual clarity, and compatibility. By following this guide, you’ll gain better control over your photogrammetric outputs and avoid downstream errors.