Agisoft Metashape is one of the most advanced photogrammetry software platforms available, enabling users to create accurate 3D models from ordinary photos. One of its most powerful yet underused capabilities is the ability to align photos with background suppression using a single mask. This technique streamlines the alignment process, reduces noise, and ensures higher-quality reconstructions — especially in projects where background clutter can interfere with camera matching.
In this comprehensive guide, we’ll explain how background suppression with a single mask works in Metashape, why it matters for your photogrammetry workflow, and how to implement it step by step. Whether you are scanning cultural artifacts, industrial parts, or objects for 3D printing, mastering this method will help you achieve cleaner, more precise models with less manual work.
Why Background Suppression Matters During Photo Alignment
Photo alignment is the critical first step in any Metashape project. During this phase, the software identifies key points across overlapping images and matches them to determine the position and orientation of each camera. The quality of this step directly affects every subsequent stage — from dense cloud generation to mesh reconstruction and texturing.
However, alignment can become problematic when background elements — such as walls, tables, lighting fixtures, or moving objects — introduce noise and false matches. These irrelevant features can confuse the matching algorithm, resulting in misaligned cameras, warped models, and wasted processing time.
This is where background suppression comes into play. By masking out irrelevant regions, you tell Metashape exactly which parts of the image should be considered during alignment. The result is a cleaner, more focused feature matching process and significantly improved reconstruction accuracy.
What Does “Single Mask” Background Suppression Mean?
Traditionally, users create masks for each individual image, which can be time-consuming — especially when dealing with hundreds of photos. However, Metashape offers a smarter approach: you can use one carefully prepared mask and apply it automatically to the entire photo set.
This technique is particularly effective when all photos share a similar background layout and the object of interest occupies roughly the same position in the frame. By generating one high-quality mask and applying it across all images, you can achieve background suppression across your dataset in just a fraction of the time.
Advantages of using a single mask include:
- Time savings: Eliminate the need to manually mask each image individually.
- Consistency: Ensure uniform masking across all photos, reducing alignment variability.
- Better alignment accuracy: Focus Metashape’s feature detection on relevant areas only.
- Faster processing: Fewer key points to analyze means shorter computation times.
Step-by-Step Guide: Aligning Photos with Single-Mask Background Suppression
Follow these steps to use a single mask for background suppression during photo alignment in Agisoft Metashape:
Step 1: Capture Consistent Photos
To successfully use a single mask, ensure your photos are captured under consistent conditions. Keep the camera angle, distance, and framing as uniform as possible. The object should remain centered and at a similar scale in every image. This consistency allows the same mask to align correctly across all images.
Pro tip: Use a turntable to rotate the object while keeping the camera stationary. This technique ensures consistent framing and background throughout the photo set.
Step 2: Create a Single Mask
Choose one representative photo from your dataset and create a detailed mask that excludes the background. You can do this using Metashape’s built-in selection tools:
- Polygon or Lasso Tool: Manually draw around the object to define the area of interest.
- Magic Wand Tool: Quickly select areas of similar color (ideal for uniform backgrounds).
- Import from Alpha Channel: If you created a mask in external software (like Photoshop), you can import it directly.
Once the mask is created, save it to apply it across the entire dataset.
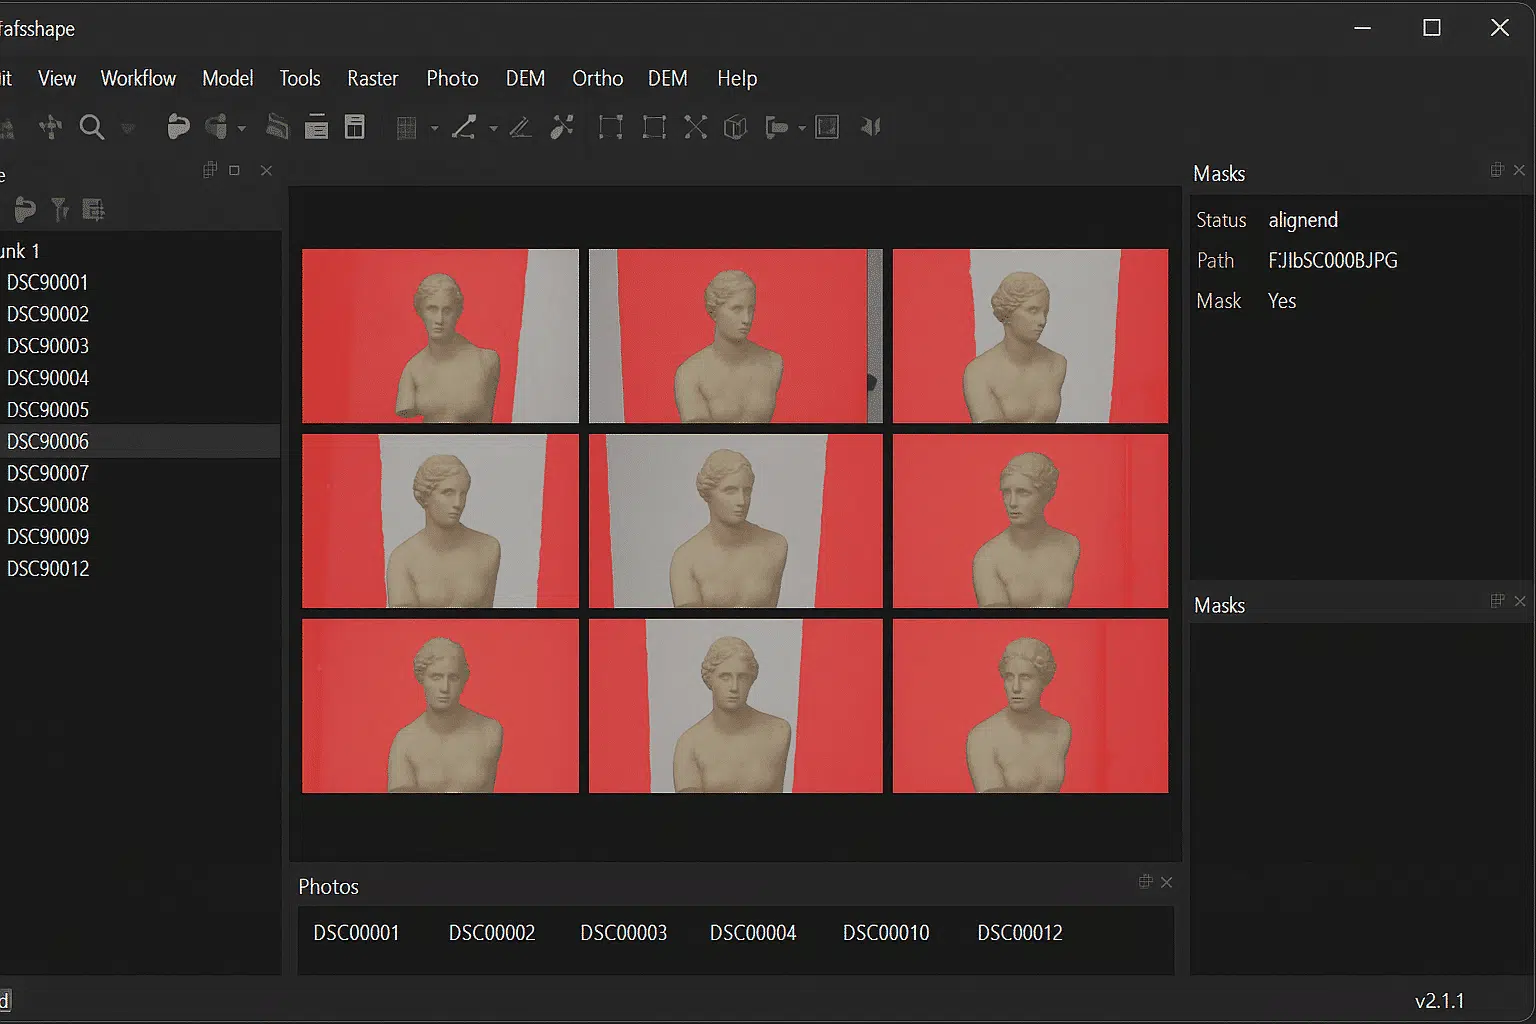
Step 3: Apply the Mask to All Photos
After creating your mask, you can apply it to all the images in your project. There are two main ways to do this:
- Copy and Paste: Right-click the masked image in the Workspace pane and choose “Copy Masks”. Then select the rest of the photos, right-click, and choose “Paste Masks.”
- Batch Apply via Script: For large projects, use Metashape’s Python API to automate the process and apply the mask programmatically across hundreds of images.
Metashape will now treat masked regions as irrelevant and exclude them from feature detection and matching during alignment.
Step 4: Align Photos with Background Suppression
With the masks applied, you can proceed with the alignment process. Go to Workflow → Align Photos and select your desired accuracy and key point limits. Because background regions are masked, Metashape will focus only on the object of interest, resulting in:
- Fewer false matches from background features.
- More accurate camera positions.
- Improved point cloud density and precision.
You’ll notice that alignment is faster and the resulting sparse cloud is cleaner and more tightly focused on the object.
Best Practices for Single-Mask Background Suppression
To get the most out of this technique, keep the following tips in mind:
- Maintain consistent framing: The more uniform your photos are, the more effective a single mask will be.
- Use a plain background: Solid, contrasting backgrounds make masking easier and more accurate.
- Verify mask alignment: After applying the mask to all photos, check a few samples to ensure the masked area aligns correctly with the object.
- Combine with background differencing: If needed, you can enhance mask accuracy by using a background reference photo in combination with the single-mask approach.
- Leverage scripting for large datasets: Automate mask application for faster workflows in large-scale projects.
Advanced Tip: Automating Single-Mask Workflow with Python
If you frequently work with large datasets, consider using Metashape’s Python scripting capabilities to automate mask creation and application. A script can automatically apply a predefined mask to every image in your project, greatly reducing manual effort.
Example automation tasks include:
- Loading a single mask and applying it to all photos in a chunk.
- Adjusting mask tolerance or feathering automatically.
- Integrating mask application into a broader automated alignment pipeline.
This approach is especially useful in production environments, such as cultural heritage digitization, industrial inspections, or volumetric capture pipelines, where repeatability and efficiency are critical.
Common Mistakes to Avoid
While single-mask background suppression is powerful, certain pitfalls can reduce its effectiveness:
- Inconsistent framing: If the object shifts significantly between photos, the single mask may not align correctly.
- Complex backgrounds: Highly textured or varied backgrounds can reduce mask accuracy. Use a neutral background when possible.
- Forgetting to check mask alignment: Always preview how the mask applies across multiple images before alignment.
By avoiding these mistakes, you’ll ensure that background suppression enhances — rather than hinders — your project results.
Conclusion: Faster, Cleaner Alignments with Single-Mask Background Suppression
Aligning photos with background suppression using a single mask is one of the most efficient ways to improve your photogrammetry workflow in Agisoft Metashape. By focusing the alignment process exclusively on the object of interest, you reduce noise, speed up processing, and achieve more accurate and detailed 3D reconstructions.
This approach is particularly valuable for object scanning, cultural heritage documentation, and industrial inspection projects, where precision and efficiency are critical. With careful image capture, consistent framing, and proper mask preparation, you can streamline your workflow and produce high-quality results with minimal manual intervention.