Agisoft Metashape is one of the most powerful photogrammetry tools available for generating highly detailed 3D models from photographs. While it’s widely used in fields like surveying, archaeology, and mapping, Metashape also excels in full-body and head scanning for applications such as 3D character creation, digital avatars, virtual production, medical modeling, and fashion. However, achieving professional-level results requires more than just taking photos — it demands careful planning, correct setup, and a solid understanding of photogrammetry best practices.
This guide explores the most effective tips and techniques for capturing full body and head scans using Agisoft Metashape. Whether you’re a beginner or an experienced 3D artist, these strategies will help you produce clean, accurate, and high-quality 3D models ready for use in games, VFX, metaverse applications, or 3D printing.
Understanding Full Body and Head Scanning in Photogrammetry
Photogrammetry relies on multiple overlapping photos of a subject from different angles to reconstruct its 3D geometry and texture. When scanning people — especially the human head and face — accuracy and consistency become even more important. Human skin, hair, and subtle anatomical features present unique challenges that require careful planning and precise execution.
Agisoft Metashape processes these images to generate a dense point cloud, mesh, and texture. The quality of the final 3D model depends on the quality of the source images and how well they cover the subject. This makes the capture stage arguably the most critical part of the workflow.
For human body or facial scans, the goal is to capture as much detail as possible without motion artifacts, lighting inconsistencies, or texture distortions. Below are best practices to achieve that.
Tip 1: Optimize Your Camera Setup for Human Scanning
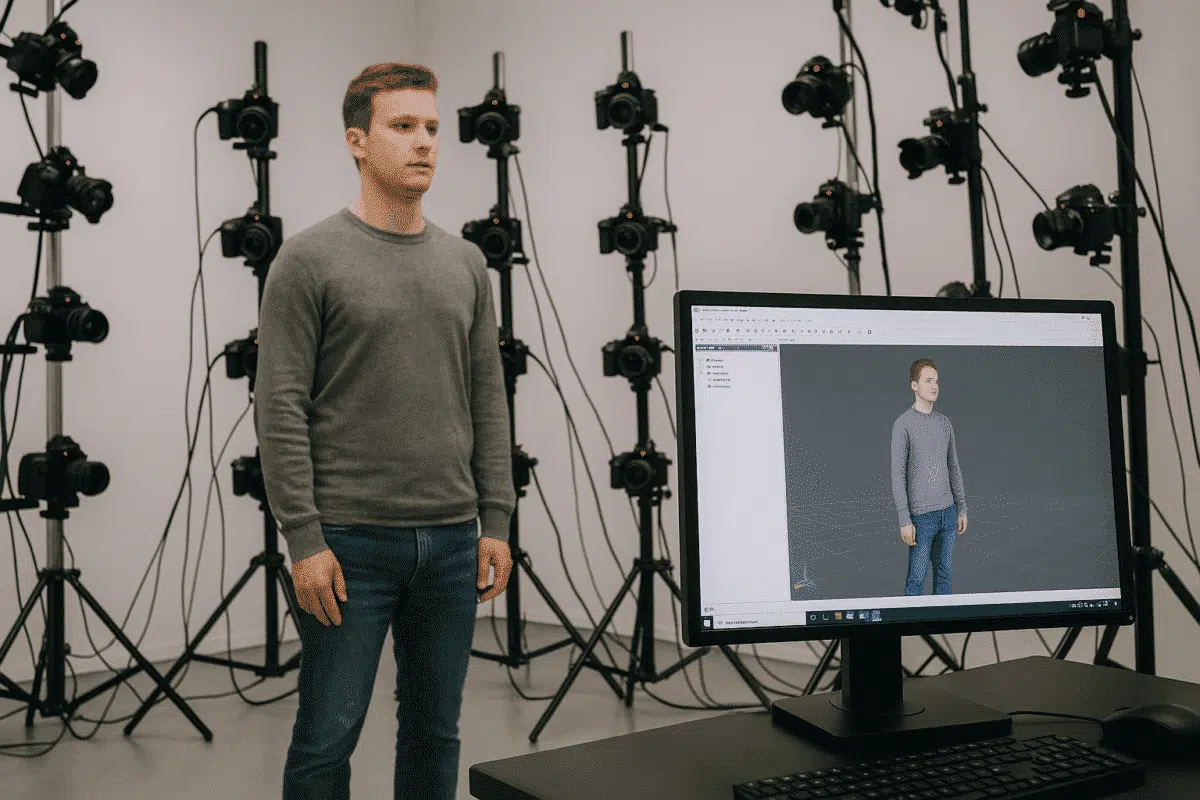
The foundation of successful full-body and head photogrammetry is a well-designed camera setup. You can achieve good results with a single camera, but for professional-quality scans, a multi-camera rig is recommended.
Multi-Camera Arrays
Using multiple synchronized cameras ensures that all images are captured at the exact same moment, eliminating motion blur and subject movement issues. This is especially important when scanning humans, as even small movements like blinking or breathing can cause reconstruction errors.
Tips for multi-camera setups:
- Use 30–100 cameras arranged around the subject in a full 360° arc for full-body scans.
- For head scans, 20–40 cameras focused on the upper body and face are usually sufficient.
- Synchronize all cameras with a trigger system to capture images simultaneously.
Single-Camera Approach
If you’re using a single camera, instruct the subject to remain completely still while you move around them. Capture images at regular angular intervals (every 10–15 degrees), ensuring about 70–80% overlap between shots. This approach is slower but still effective for smaller projects or mobile scanning setups.
Tip 2: Control Lighting for Consistent Results
Lighting is one of the most critical factors in photogrammetry, especially when scanning skin and facial details. Uneven lighting can cause texture distortions, shadows, or overexposed areas that reduce the quality of the final model.
Use Soft, Even Lighting
Diffuse lighting from multiple sources minimizes harsh shadows and specular highlights. Softboxes, LED panels with diffusers, or light tents are excellent choices. The goal is to create even illumination across the entire subject.
Additional lighting tips:
- Avoid direct flash or strong directional light that can wash out details.
- Ensure color temperature consistency across all lights to avoid texture color shifts.
- Consider using a 360° light dome setup for perfectly even lighting in studio environments.
Tip 3: Position the Subject Correctly
How you position your subject during scanning has a direct impact on the accuracy of your 3D reconstruction. Stability and consistent posture are essential.
- Ask the subject to stand naturally with arms slightly away from the body to avoid occlusion.
- For head scans, use a headrest or stabilizer to minimize micro-movements.
- Ensure the subject maintains a neutral expression — facial changes between shots can cause reconstruction errors.
For full-body scanning, placing markers or footprints on the floor helps the subject stay in the correct position throughout the capture process.
Tip 4: Capture Images at the Right Resolution and Overlap
Image quality directly determines reconstruction detail. Use a camera with at least 20 megapixels for professional results, and shoot in RAW format if possible to preserve color and detail information.
When capturing images:
- Maintain 70–80% overlap between adjacent shots for reliable feature matching.
- Cover the subject from all angles — including top-down and low perspectives — to avoid missing geometry.
- Pay special attention to complex areas such as the ears, jawline, under the chin, and between arms and torso.
For facial scanning, take additional close-up shots of the face from multiple angles. These images help capture fine details like skin pores, wrinkles, and eye contours.
Tip 5: Consider Clothing, Hair, and Accessories
Some materials and textures pose challenges for photogrammetry. Shiny fabrics, transparent materials, and loose hair can be difficult to reconstruct accurately.
Best practices:
- Use matte clothing and avoid reflective materials to reduce noise in the point cloud.
- Tie back long hair or use a neutral cap to minimize movement and occlusion.
- Remove glasses or reflective accessories that could distort feature matching.
If scanning for digital humans or avatars, neutral, form-fitting clothing helps capture accurate body geometry without additional artifacts.
Tip 6: Calibrate Cameras and Use Markers
Accurate camera calibration is essential for high-precision scanning. In Metashape, calibration can be performed automatically, but for best results — especially in controlled studio environments — you can use a calibration board before shooting.
Additionally, using coded markers on the floor or around the subject helps Metashape align images more accurately, especially when dealing with complex geometry like limbs and joints.
Tip 7: Optimize the Metashape Workflow for Human Scans
Once you’ve captured your images, the processing workflow in Metashape requires some specific considerations for full-body and head scans:
1. Align Photos Carefully
Use High Accuracy and increase the key point limit to improve feature detection, especially for skin and subtle facial features.
2. Clean the Sparse Point Cloud
Manually remove outliers or background points before building the dense cloud. This ensures cleaner geometry and reduces processing time.
3. Build a High-Quality Mesh
When generating the mesh from the depth maps, choose High or Ultra High quality settings if your hardware allows it. This preserves small anatomical details critical for realistic results.
4. Texture with High-Resolution Maps
Use 8K or higher texture resolution for detailed skin features. Consider using mosaic blending mode for more accurate texture reconstruction.
Bonus Tip: Post-Processing for Professional Results
While Metashape produces highly accurate models, post-processing can further enhance results. Export your model to software like Blender, ZBrush, or RealityCapture for additional refinement, retopology, or texture painting. For production use in games or VFX, you may also want to create a low-poly version with baked normal maps.
Conclusion: Capture Human Detail with Confidence
Capturing high-quality full-body and head scans in Agisoft Metashape is a blend of art and science. With careful planning, controlled lighting, precise camera setup, and attention to subject positioning, you can produce incredibly detailed and realistic 3D human models suitable for any application — from digital avatars to visual effects and beyond.
Mastering these tips will not only improve the quality of your scans but also reduce processing time and post-production work. As the demand for realistic 3D humans grows across industries, honing your photogrammetry skills will give you a significant competitive advantage.